VECTOR ICON FONTS
MAIN OBJECTIVE
In this tutorial we will look at vector icon fonts, specifically Font Awesome and Icomoon. We will discuss what they are, why they are useful, and how to download and call them on your websites. By the time we are through you should have a working knowledge of both of these font families and how to properly impliment them on your own sites.
You may be asking yourself why and where would you use Vector Icon Fonts. The answer to where is pretty broad.They are vector, so that means they are scalable without having to worry about distortion or pixelation and are usable in both web and print media. That's also a pretty good reason why to use them as well. Other reasons to use them are that they are completely stylable through CSS. You can quickly adjust size, color, and orientation by using your own style sheet. They are downloadable so that you can use them locally for your other projects. They are compatible with screen readers so that your site can remain in compliance with accessability. Last but not least, they are a font, so that means that instead of searching for images the browser can easily find them because they are preloaded which allows your website to run faster.
There are two different sites that we will discuss in the following tutorials. Font Awesome and IcoMoon are websites which both allow you to download and use a wide variety of premade vector icons in your websites and print work. They are both easy to call and customize. With Font Awesome, what you see is what you get, so you are limited to their pre-made selection. IcoMoon allows you to create your own vector icons to use along with their pre-made icons. They're both very useful, and I can't really say that one is better than the other. In the end it comes down to personal preference.
SUB OBJECTIVES
- Font Awesome
- How to Use
- Calling Fonts
- Sizing Fonts
- Animated Icons
- Stacking Icons
- IcoMoon
- How to Create and Download
- Calling Fonts
- Creating Your Own Icon
PREREQUISITES
In order to successfully complete this tutorial you will need to have a basic working knowledge of HTML. You will need to know how to use HTML id's and classes. You will need an understanding of CSS Properties and how to use them on targeted elements on your web pages.
FONT AWESOME
Using Font Awesome
In order to use Font Awesome you will first have to download the icon package by clicking the giant download button on their homepage. You can refer to the screen shot below so that there is no confusion.
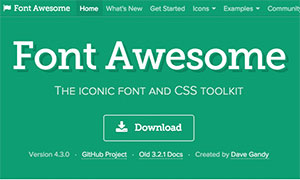
After you have downloaded the file you should copy the entire directory into your root folder somewhere. After that is done you will link to the CSS file in the <head> of your document.
Below is and example of how it looks on my site.
For more information on how to install Font Awesome in something other than CSS you can click HERE.
Calling the Icons
HERE on Font Awesome's website, you can find a list of all of the icons and the short codes that go along with them. These short codes are what you will use to call the icons into your document. You simply click on the icon that you would like to use and a page will pop up that displays the shortcode to be used in your website. If you would like to use the icon as it is then you would simply take the shortcode and place it inside of an <i> tag wherever you would like it to go in your code.
Font Awesome just added a bunch of new icons. This is my favorite out of all of the new ones.
Motorcycle Madness
As you can see I added the motorcycle icon to my page. From here we can do a bunch of different things with it, but for now I'll just show you the basic code that I used to call the icon. Take notice that I'm calling the icon with the <i> tag and the actual name of the icon being called is in the class of the <i> tag. Generally you will not put any code between the open and close tags of the icon, you will instead nest it inside of another tag that will house your content. As you can see below I have done that to add my "motorcycle madness" text. You can click HERE to see it on the Font Awesome site
Font Awesome just added a bunch of new icons. This is my favorite out of all of the new ones.
Motorcycle Madness
Resizing the Icons
One size does not fit all! There will come a time whenn the standard size of the icons just wont do and you'll need something larger or smaller. In Font Awesome resizing the icons is fairly simple to do. There are always 6 different sizes for each icon and FA provides you with a simple way to size them. They provide you with classes that you can place after calling the icon name that will resize it without using CSS. These classes are fa-lg, fa-2x, fa-3x, fa-4x, fa-5x. You may notice that there are only 5 classes and I said there were 6 sizes. That's because the sixth size is the standard icon size.
Standard Size
fa-lg / Large Icon
fa-2x / Double size
fa-3x / 3 Times Larger
fa-4x / 4 Times Larger
fa-5x / 5 Times Larger
This is what the code looks like for the above example. Pay close attention to where the size classes are placed.
Standard Size
fa-lg / Large Icon
fa-2x / Double size
fa-3x / 3 Times Larger
fa-4x / 4 Times Larger
fa-5x / 5 Times Larger.
Animating the Icons
Animating the icons is fairly srtraight forward. Font Awesome provides you with the fa-spin class to spin the icons. You can also use CSS3 animations on your icons (which we will touch on in a later tutorial). The spinning icons are particularly useful to use when you want to indicate the loading of pages or images.
Our Motorcycle. This isn't very practical. I just thought it would be cool to see the motorcycle spin!
You could use something like this to indcate when something is loading.
You could use something like this to indcate when the page is being refreshed
.
To create the spinning icons shown above I used the code shown below. Notice where the fa-spin class is placed.
Our Motorcycle. This isn't very practical. I just thought it would be cool to see the motorcycle spin!


You could use something like this to indcate when something is loading.


You could use something like this to indcate when the page is being refreshed.
Stacking the Icons
Font Awesome allows you to do this really cool thing called stacking icons. It allows you to take two seperate icons and combine them to make one custom icon. They make it pretty simple to do this without having to touch CSS. The idea is that you will wrap your icons inside of a parent. That can be pretty much whatever you want it to be, the parent will then have a class of fa-stack. The icons inside the parent will have specific class names as well. Pay attention to how you want them to be stacked because that will dictate which class you assign to each one. For whichever of the icons will be the smaller you will use fa-stack-1x and for the larger icon you will use fa-stack-2x. You can do other things inside the icon classes like invert the colors with fa-inverse. You can also style them like you would any other icon. If you want to get real fancy you can style the parent with any of the size classes that we talked about earlier. Below is an example of some stacked icons.
 Bombs are bad! MMMMMKAY!


 Once again, just because we can add a motorcycle icon.


 For all the gamers out there.
EXAMPLE
This is how the code is written out in order to achieve the above effect.
Bombs are bad! MMMMMKAY! Once again, just because we can add a motorcycle icon. For all the gamers out there.
I focused on what I feel are the important aspects of Font Awesome in the lessons above. In reality, those lessons represent a very small section of what you can do with these icons. For more information on how to use, style, and transform Font Awesome icon fonts you can click HERE.
Ico Moon
Downloading Ico Moon
IcoMoon is another version of a vector icon font. It is very similar to Font Awesome as far as what the icons are and what you can do with them. IcoMoon functions a little differently in the code and the way you go about downloading it is a bit different. There doesn't really seem to be an advantage to one or the other. IcoMoon gives you the option to purchase premium icons if you like, but the biggest difference is their app. Through the IcoMoon app you can search for icons, edit existing icons, and upload your own custom icons. If Font Awesome is Chevy then IcoMoon would be Ford. They both make the same product, they just do it a bit differently and have different features. It's up to you to decide which one you prefer.
Downloading IcoMoon is a little different than downloading Font Awesome. There is a link in the upper right corner in the menu bar that you can click that will take to to the IcoMoon app.
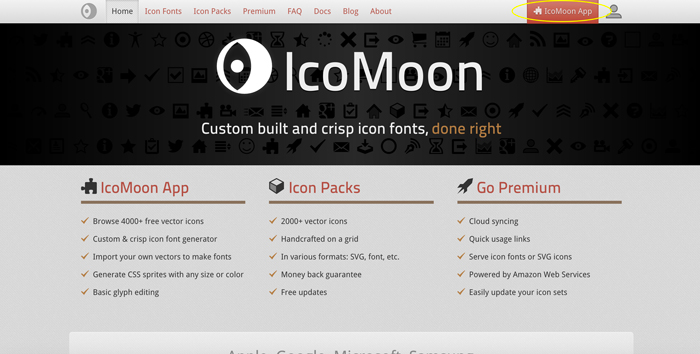
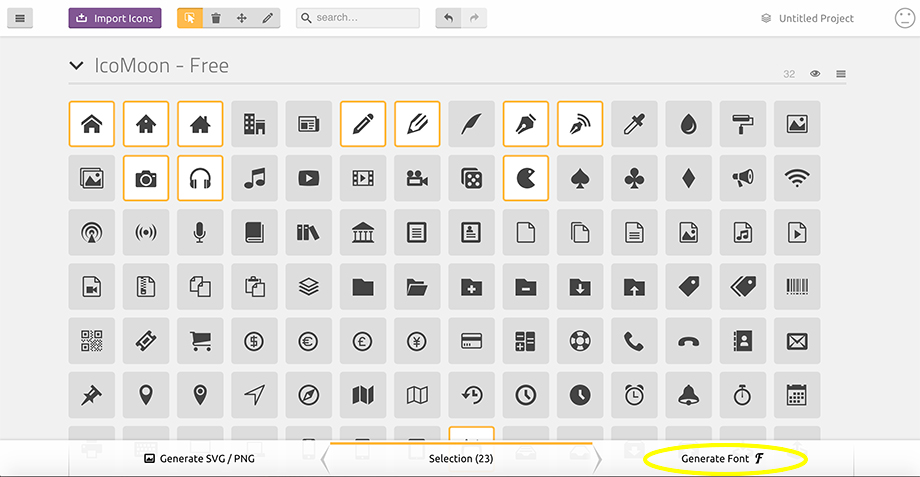
Once you are on the app screen IcoMoon allows you to pick and choose which icons you want to download by clicking on them. After you have chosen which icons you want to download you will click the "GENERATE FONT" button in the lower right.
Once you have clicked the generate font button you will be taken to another screen which will show you which icons you have chosen and the class names for each one as well as how to call each one in your code. once you have reviewed all of this and made any changes that you would like to make you can click the "DOWNLOAD" button on the bottom right to download the directory to your website.
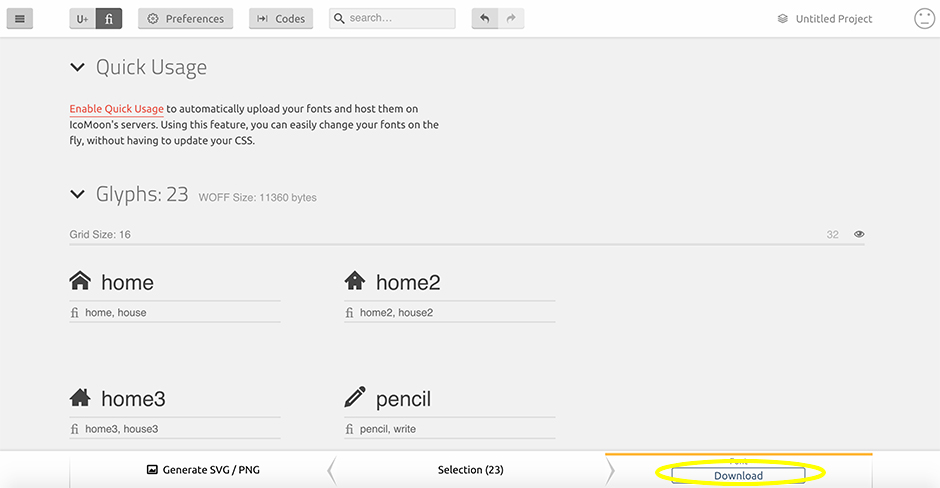
After you have downloaded the file to your directory you can connect it to your site the same way you did with Font Awesome, by linking the style.css file from the IcoMoon folder to your website. Once you have done this you can call the IcoMoon icons wherever you want.
This is how the code looks on my site.
Calling IcoMoon Icons
Calling IcoMoon icons is pretty straight forward and done much like Font Awesome. IcoMoon suggests that you call the icons in a <span>tag. You will give the <span> tag a class. That class will start with the word icon followed by a - and then the name of the icon. The names of the icons are provided for you on the IcoMoon site as well as the demo.html file that was included in your file from IcoMoon. As long as you have called the IcoMoon CSS file properly in the head of your document your icons will show up where you place them.
PACMAN


GRUMPY FACE


FIRE IT UP!
EXAMPLE
Below you can see the code that I used to add the icons.
PACMAN
GRUMPY FACE
FIRE IT UP!
Creating Your Own Icon
OK, here's where IcoMoon gets really cool. With IcoMoon you can create your own icons from scratch and upload them to the IcoMoon gallery. The first thing you have to do is create an icon to upload. I have taken the Division Fifteen icon and saved it as an SVG file. IcoMoon only accepts SVG (Scalable Vector Graphic) files to create a custom icon. Below you can see the Icon that I have created.
![]()
Once you have your icon made you will need to click on the "IMPORT ICONS" button in the upper left of the screen.
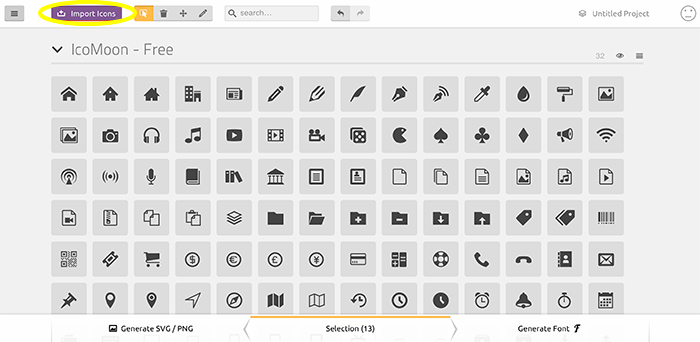
You will choose the file that you want to convert and once it is done it will show up in its own set of icons.
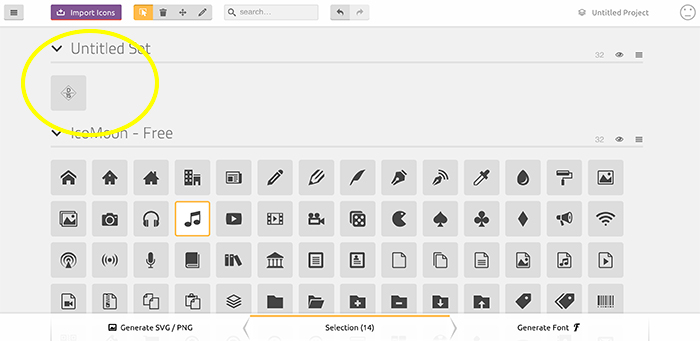
After uploading the icon you will simply download it and call the same way as you would any other of the IcoMoon icons.
Regular Size


24 Pixels


44 Pixels


64 Pixels
Unlike Font Awesome, you can only size IcoMoon icons through CSS. You do this by simply changing the font size as I have done above. Normally you would do this through calling the class in your CSS, but for the purposes of this lesson I have styled them in line.
EXAMPLE
As you can see by the code below this is definitely an icon and not just an image that has been resized.
Regular Size
24 Pixels
44 Pixels
64 Pixels
You can use the IcoMoon app by clicking HERE. Try it out for yourself and add a little extra style to your website while helping to speed it up in the process.
